Web ACLs with managed rules
Situation
You are the sole developer for the start up Juice Shop. Your website is a simple web application backed by a SQL Database. For some reason, a group of Milkshake bandits have started attacking your site!
Luckily, you recently attended a workshop on AWS WAF. You decide to implement your own WAF to protect your site.
At this time, you don’t have much time, so you decide to deploy two AWS Managed Rule groups to your WebACL. This will protect your website from the common attacks the milkshake bandits are using.
Web ACLs with managed rules
Web ACLs (Web Access Control List) is the core resource in an AWS WAF deployment. It contains rules that are evaluated for each request that it receives. A web ACL is associated to your web application via either an Amazon CloudFront distribution, AWS API Gateway API or an AWS Application Load Balancer.
Managed rule groups are a set of rules, created and maintained by AWS or third-parties on the AWS Marketplace. These rules provide protections against common types of attacks, or are intended for particular application types.
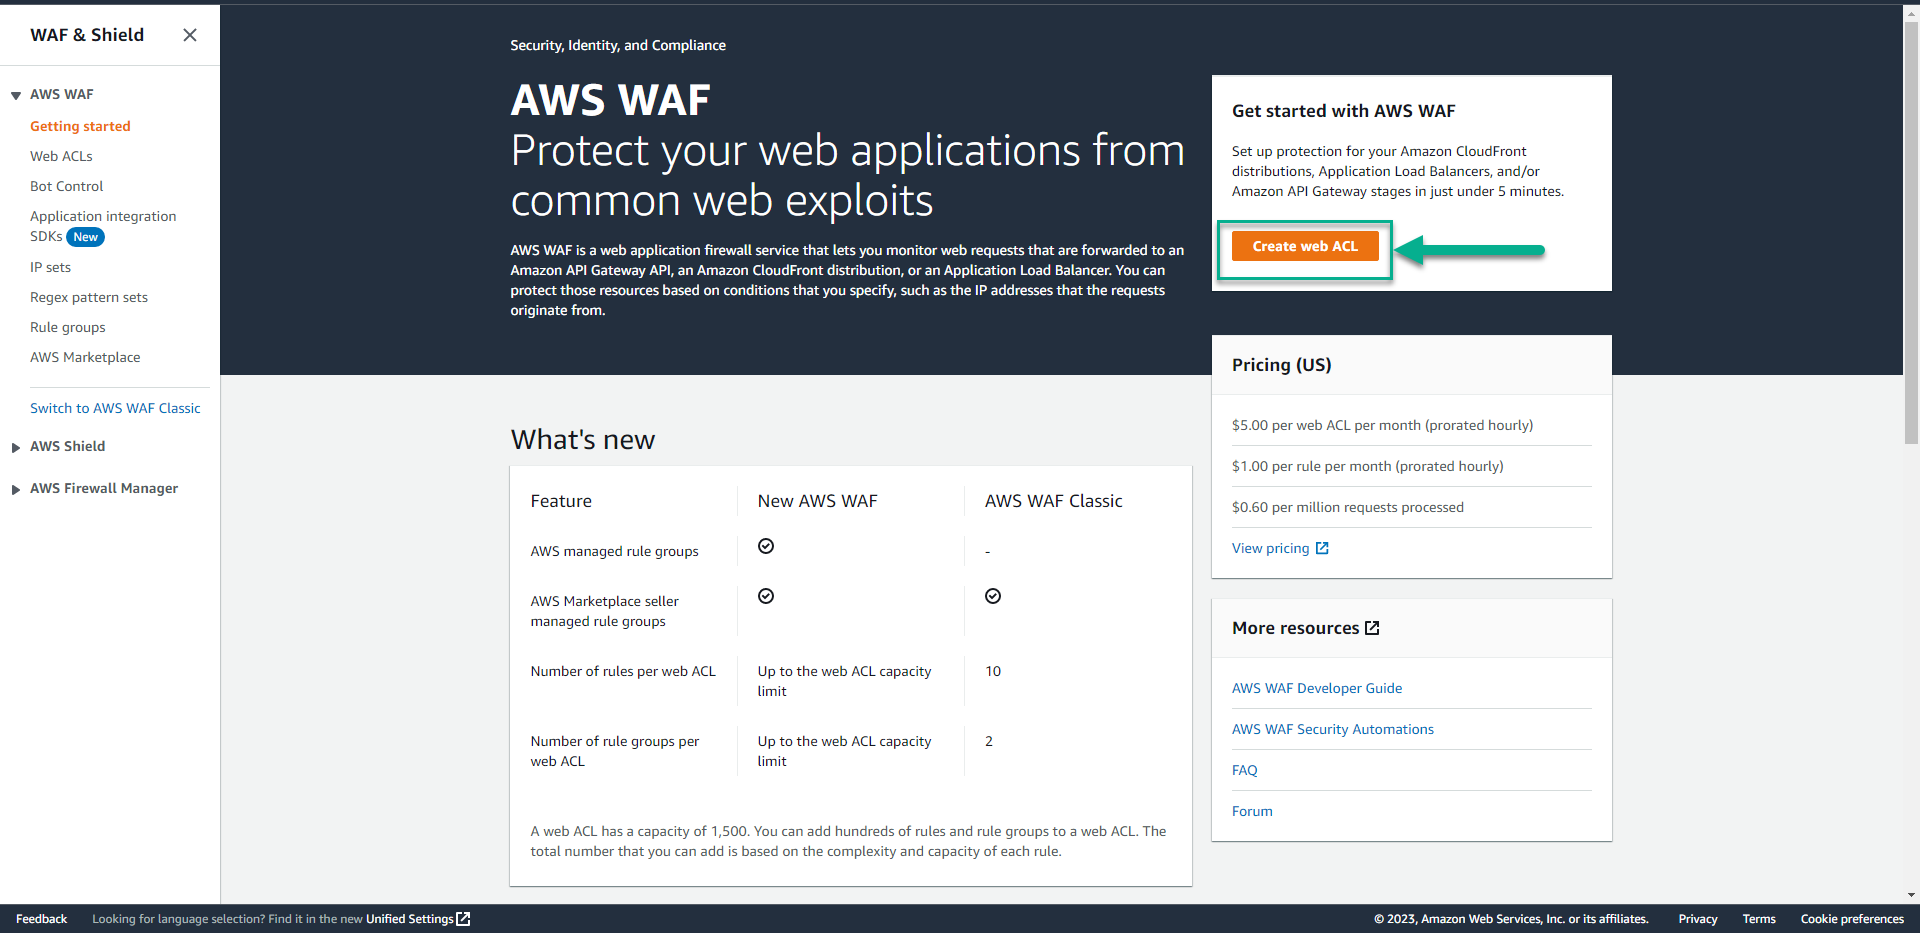
- Goto AWS WAF Console.
This workshop uses the latest version of AWS WAF. Make sure you do not use WAF Classic.
- Click Create web ACL.
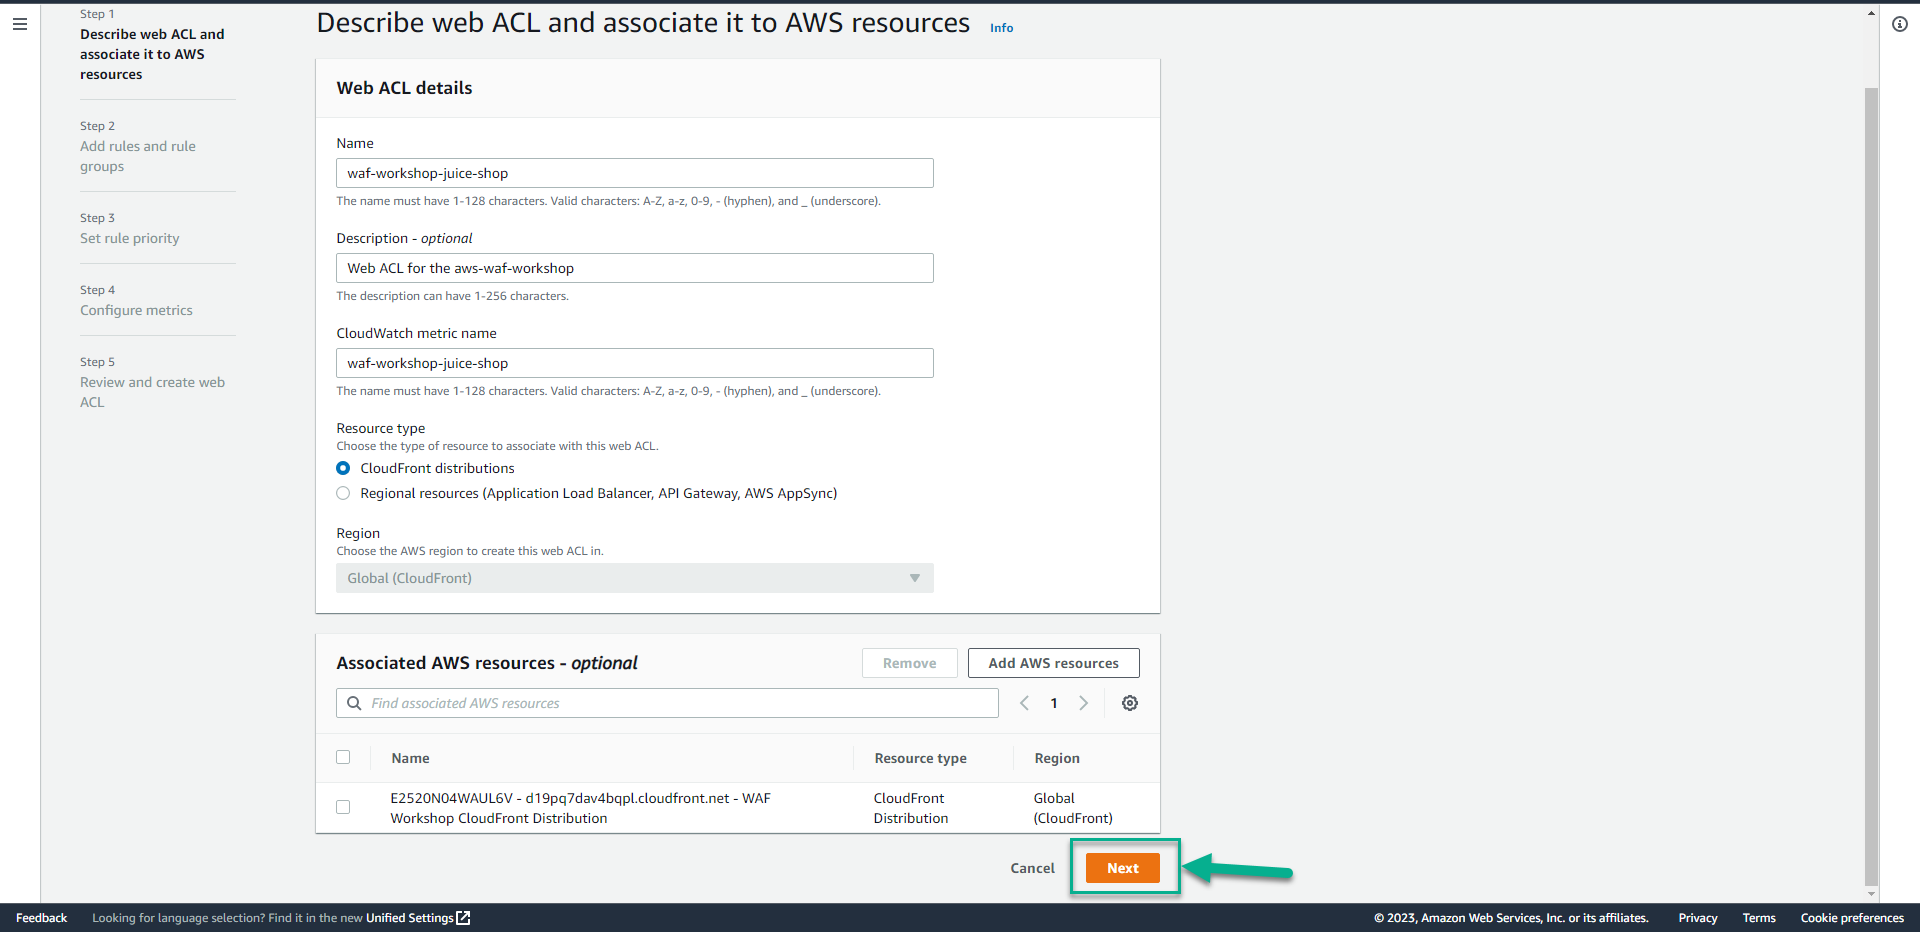
- In the Web ACL details section.
- In the Resource type section, Click CloudFront distributions.
- In the Name section type
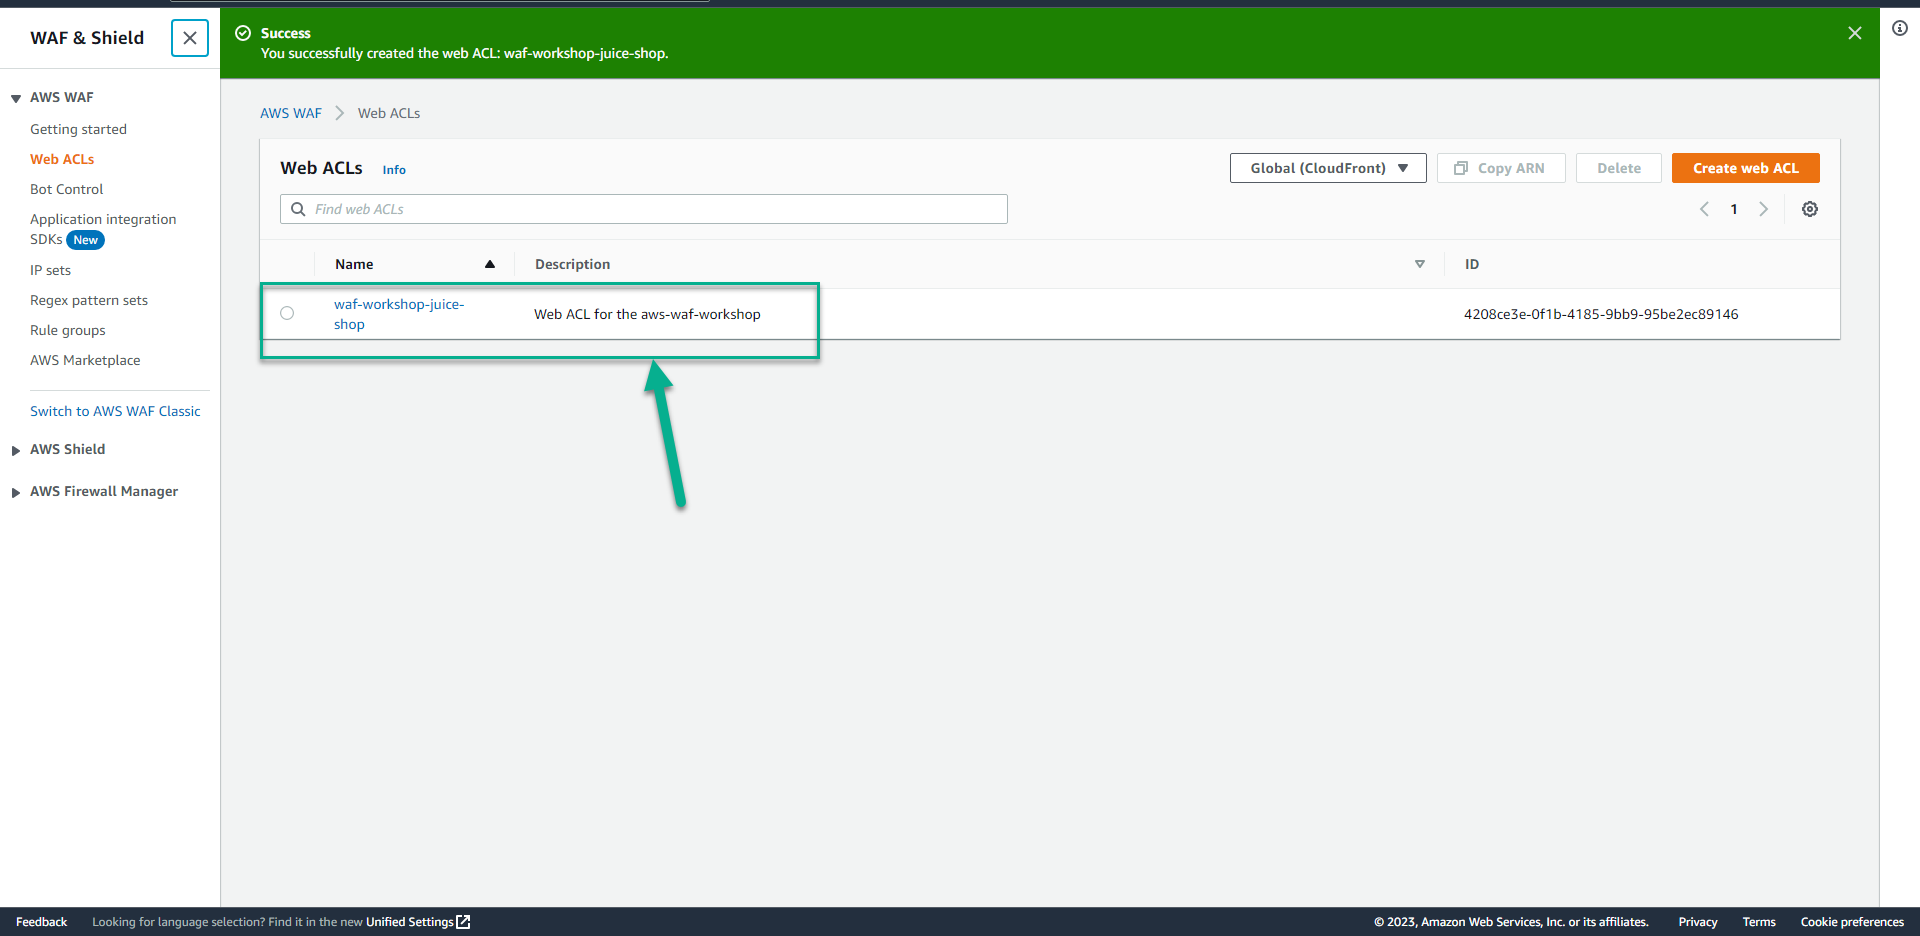
waf-workshop-juice-shop. - In the Description section type
Web ACL for the aws-waf-workshop.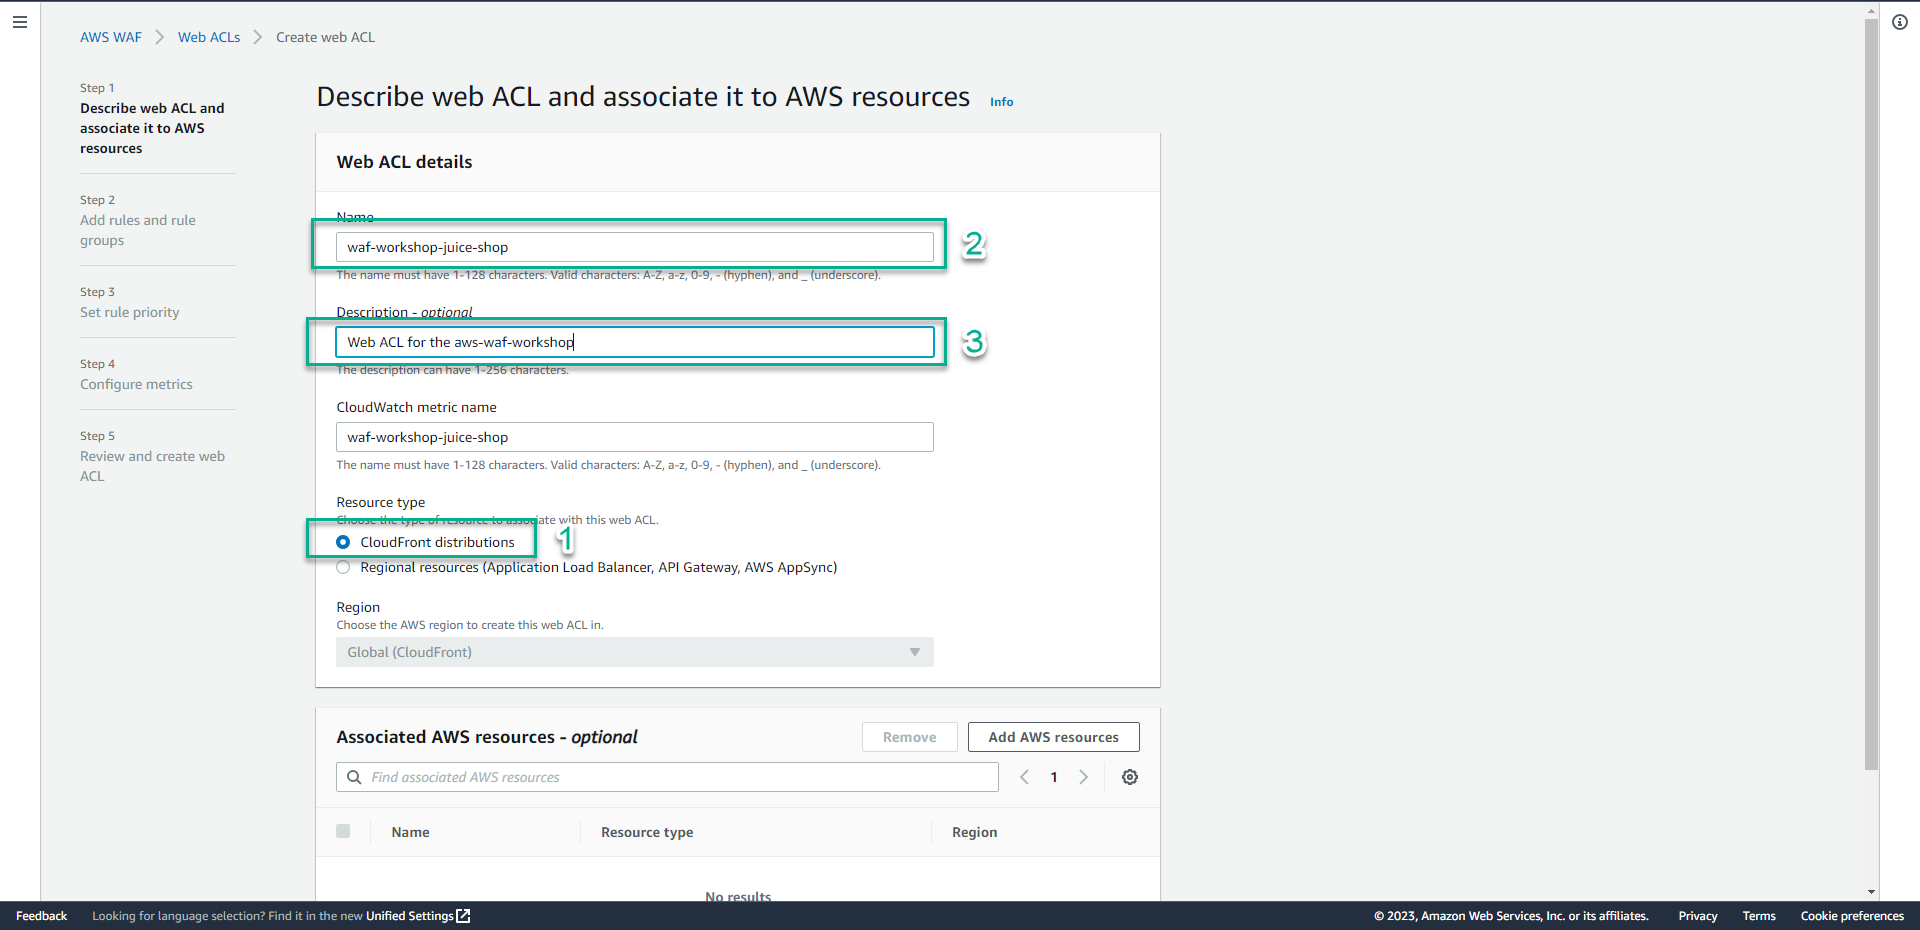
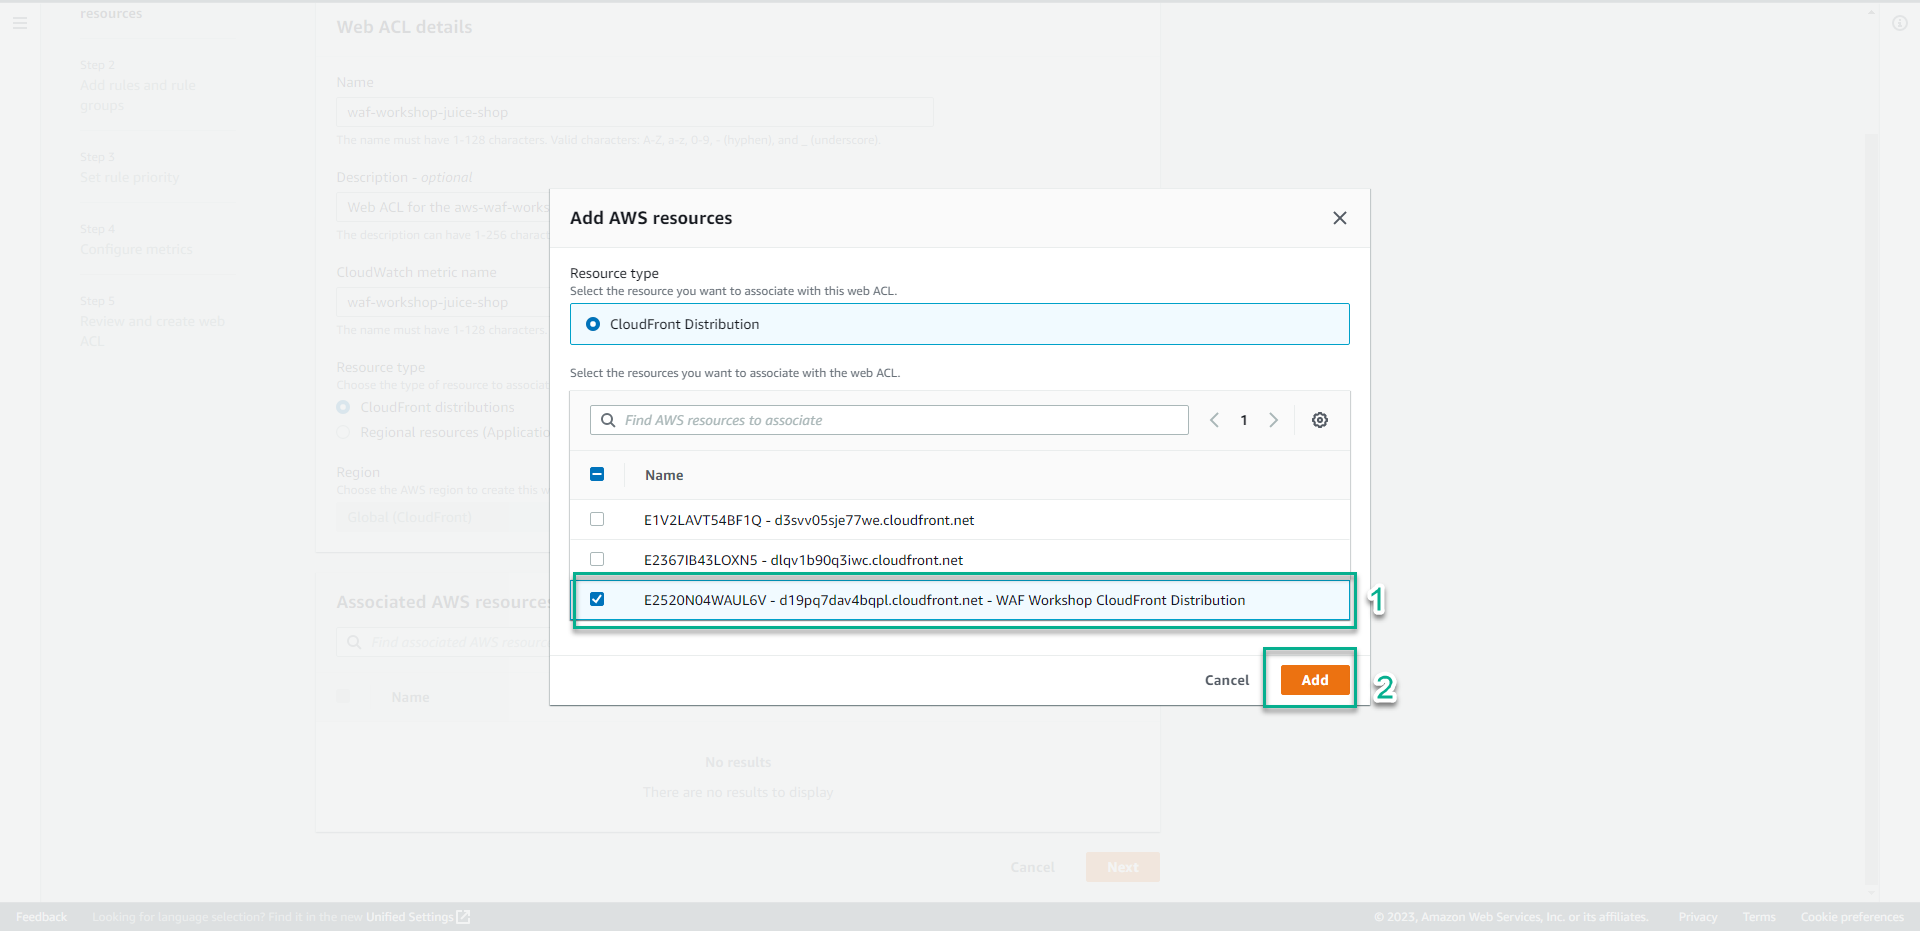
- In the Associated AWS resources section, Click Add AWS resources.
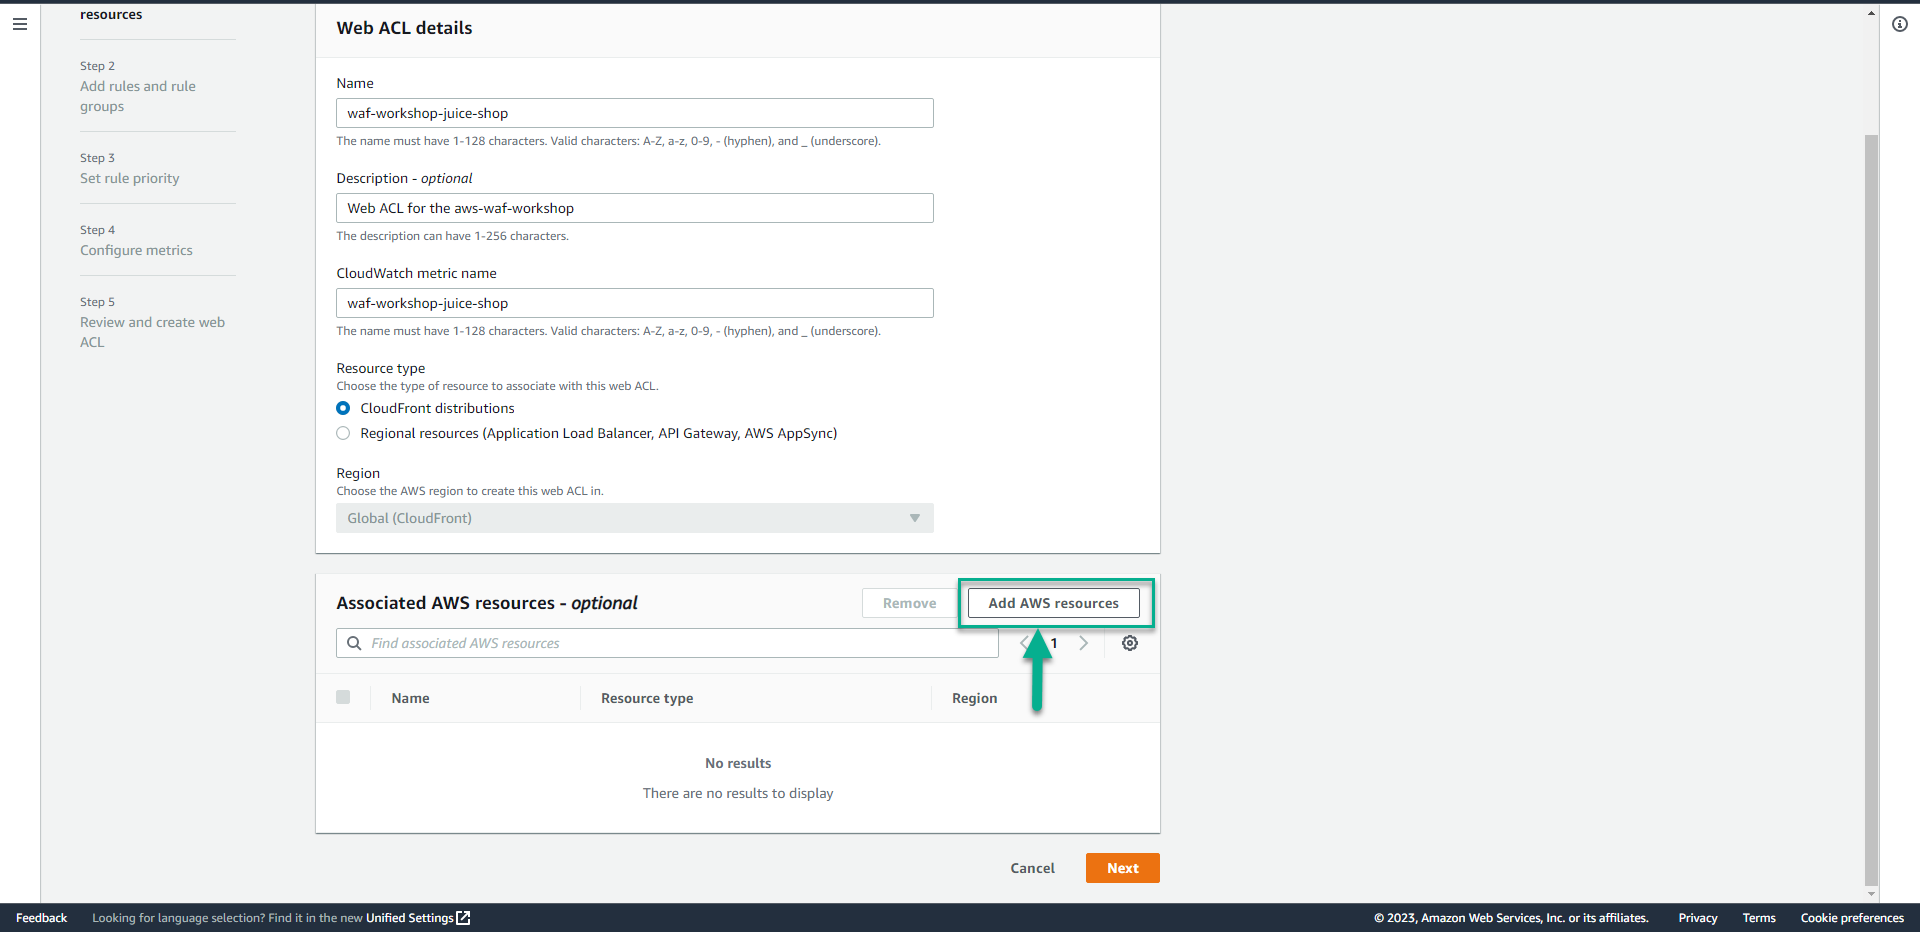
- In the Add AWS resources section, Click E24BURECS1O10C - dkievcmqb5kzc.cloudfront.net - WAF Workshop CloudFront Distribution(CloudFront distribution we created).
- Click Add.
- Click Next.
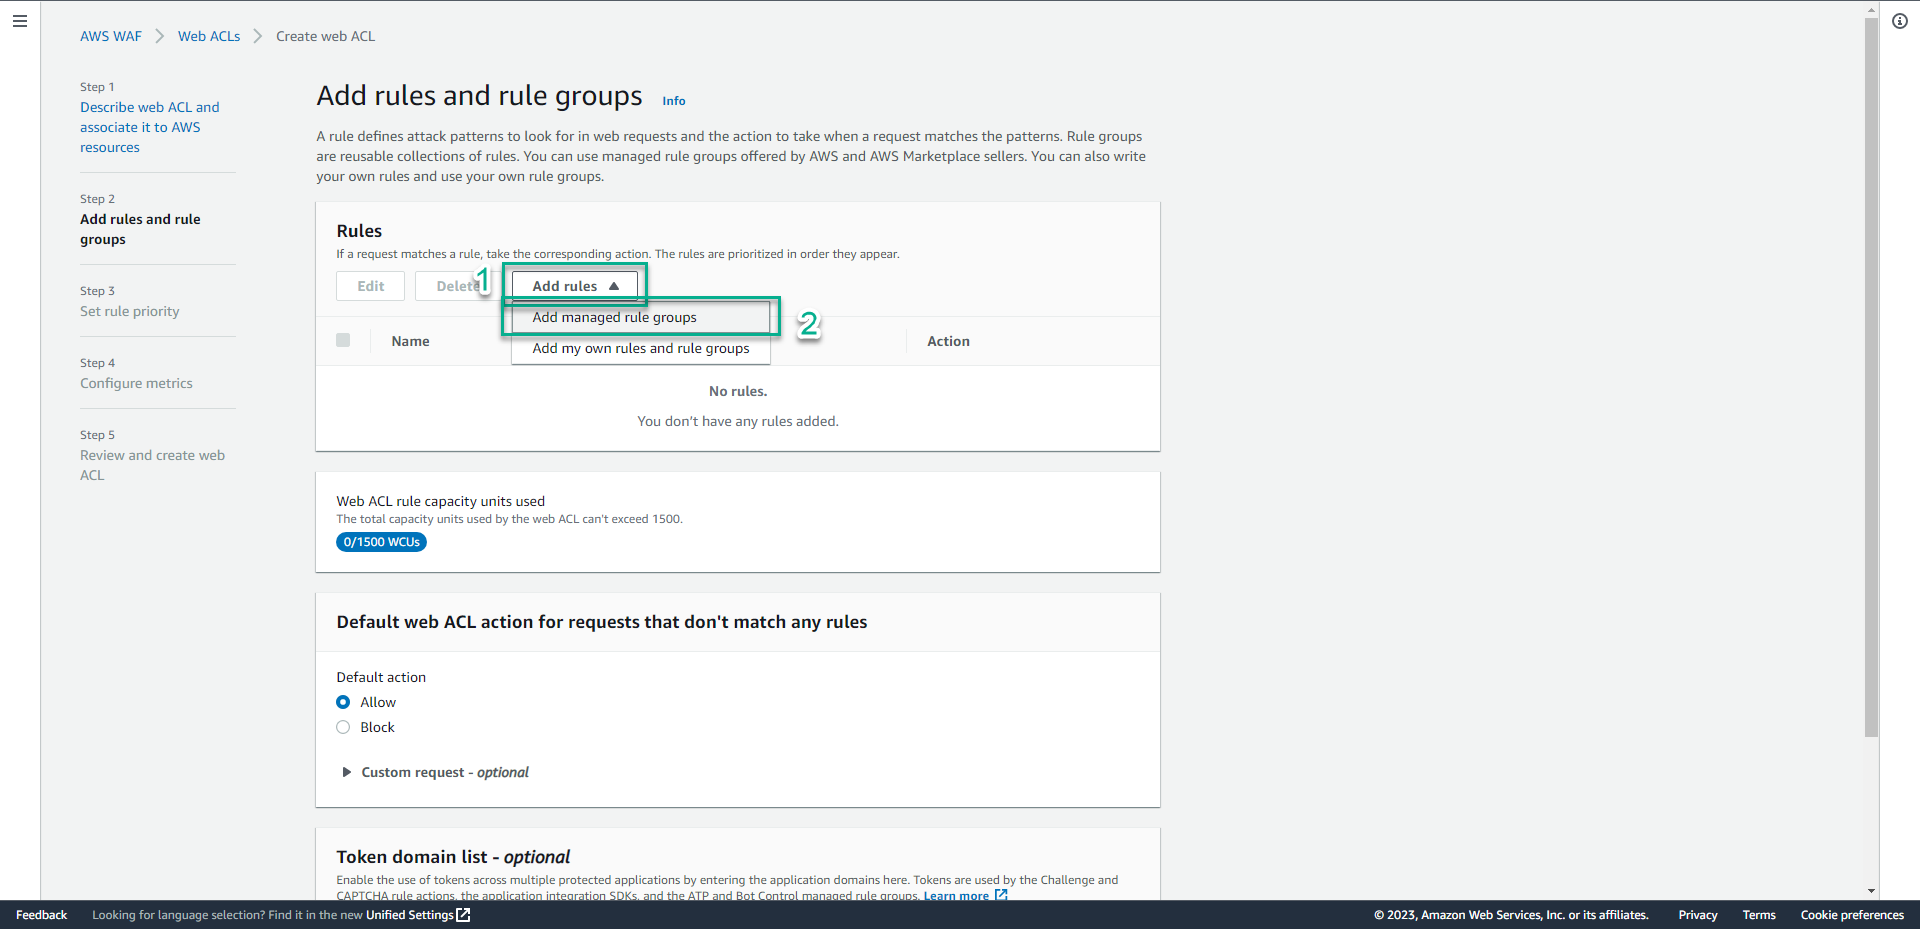
- In the Rules section.
- Click Add rules.
- Click Add managed rule groups.
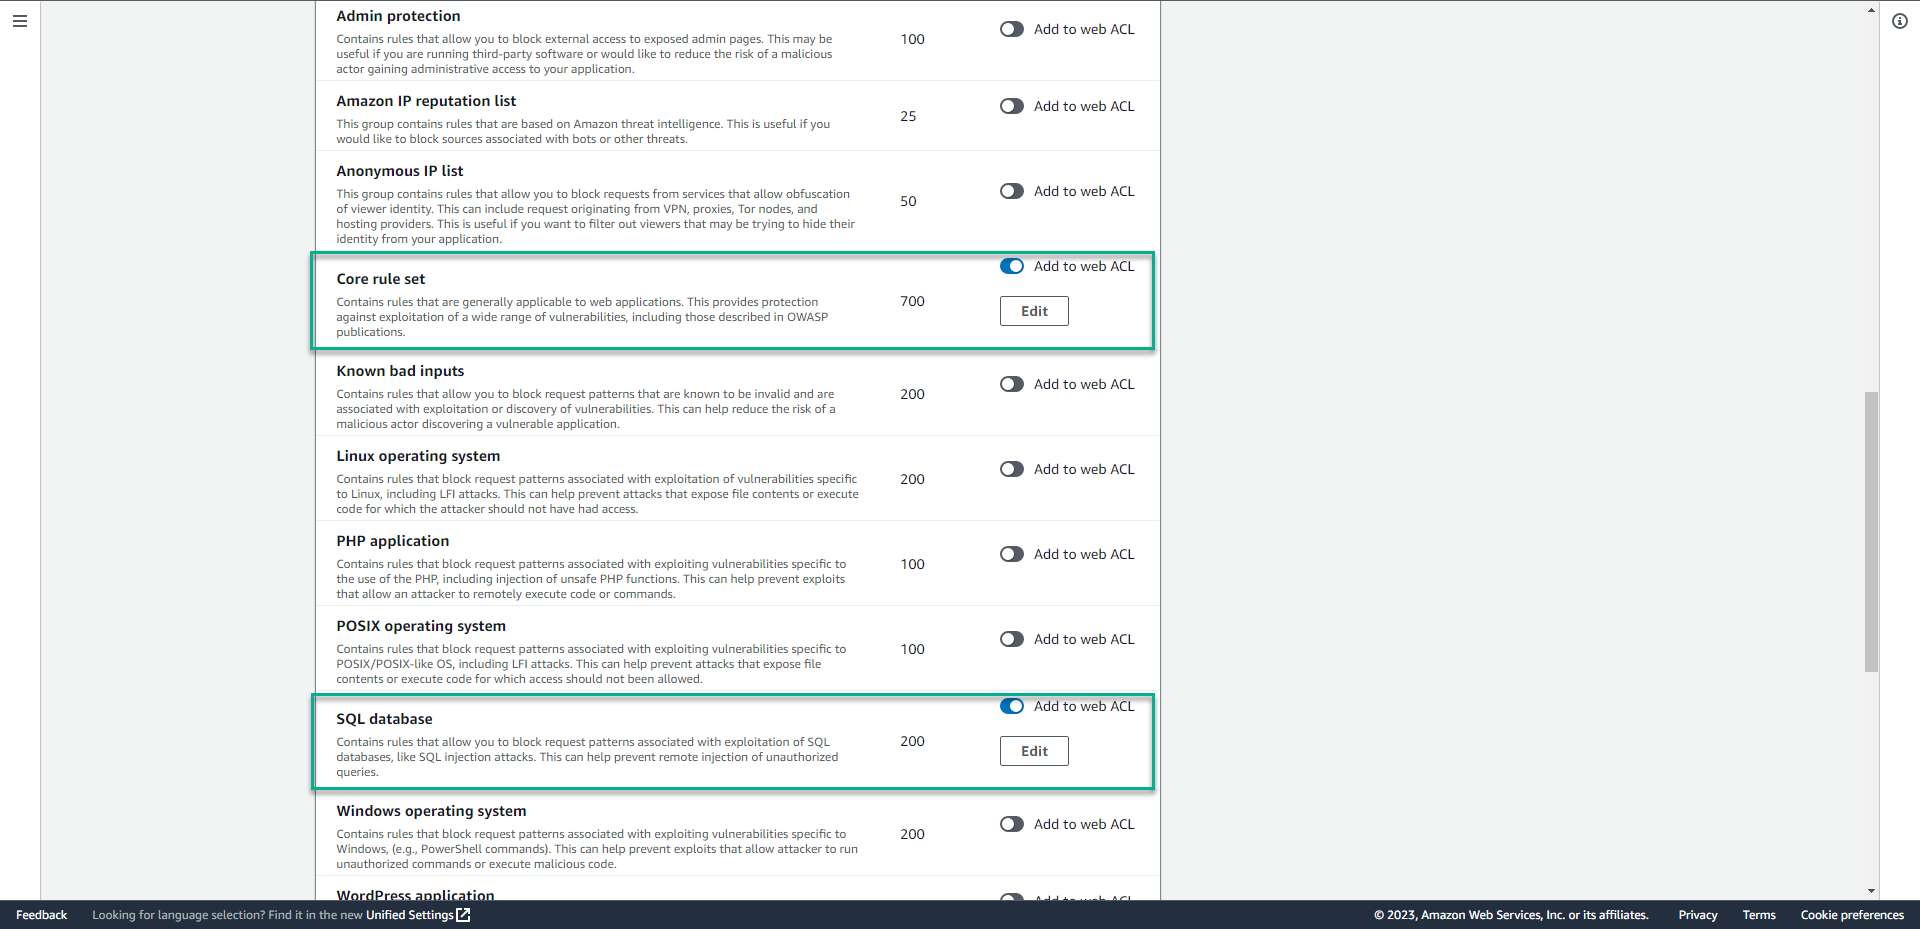
- In the Add managed rule groups page, Click AWS managed rule groups.
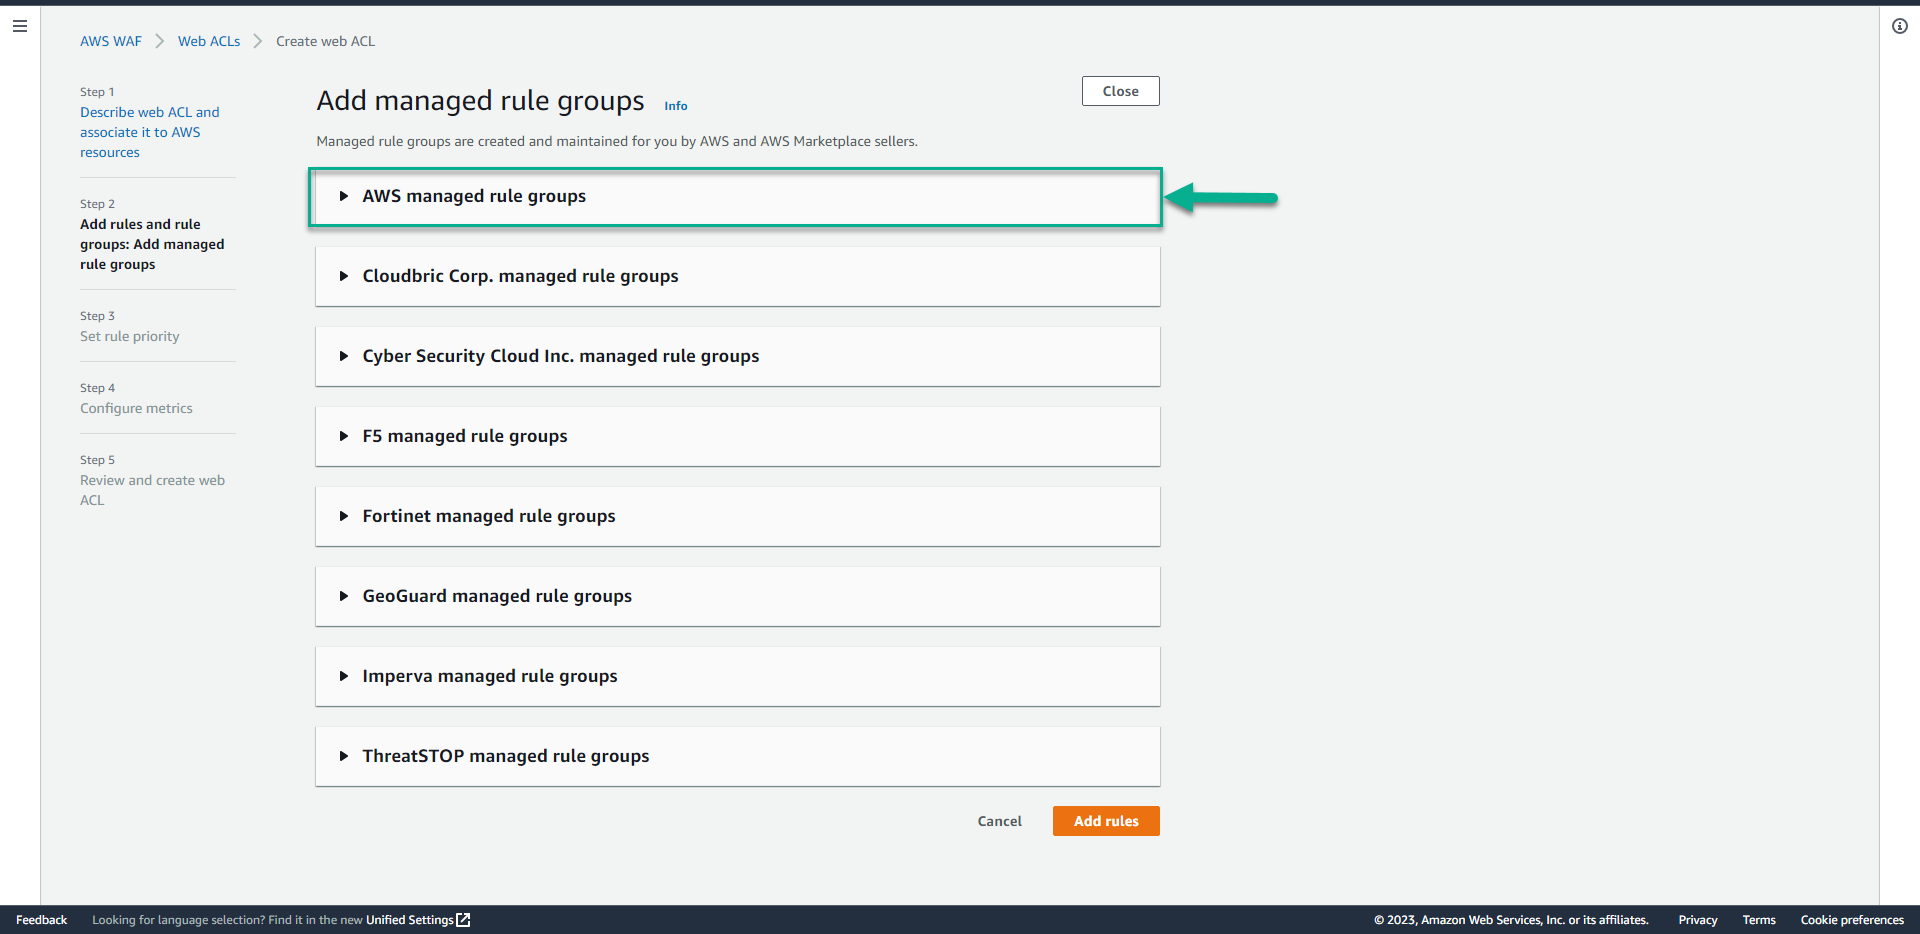
- Select Core Rule Set and SQL Database.
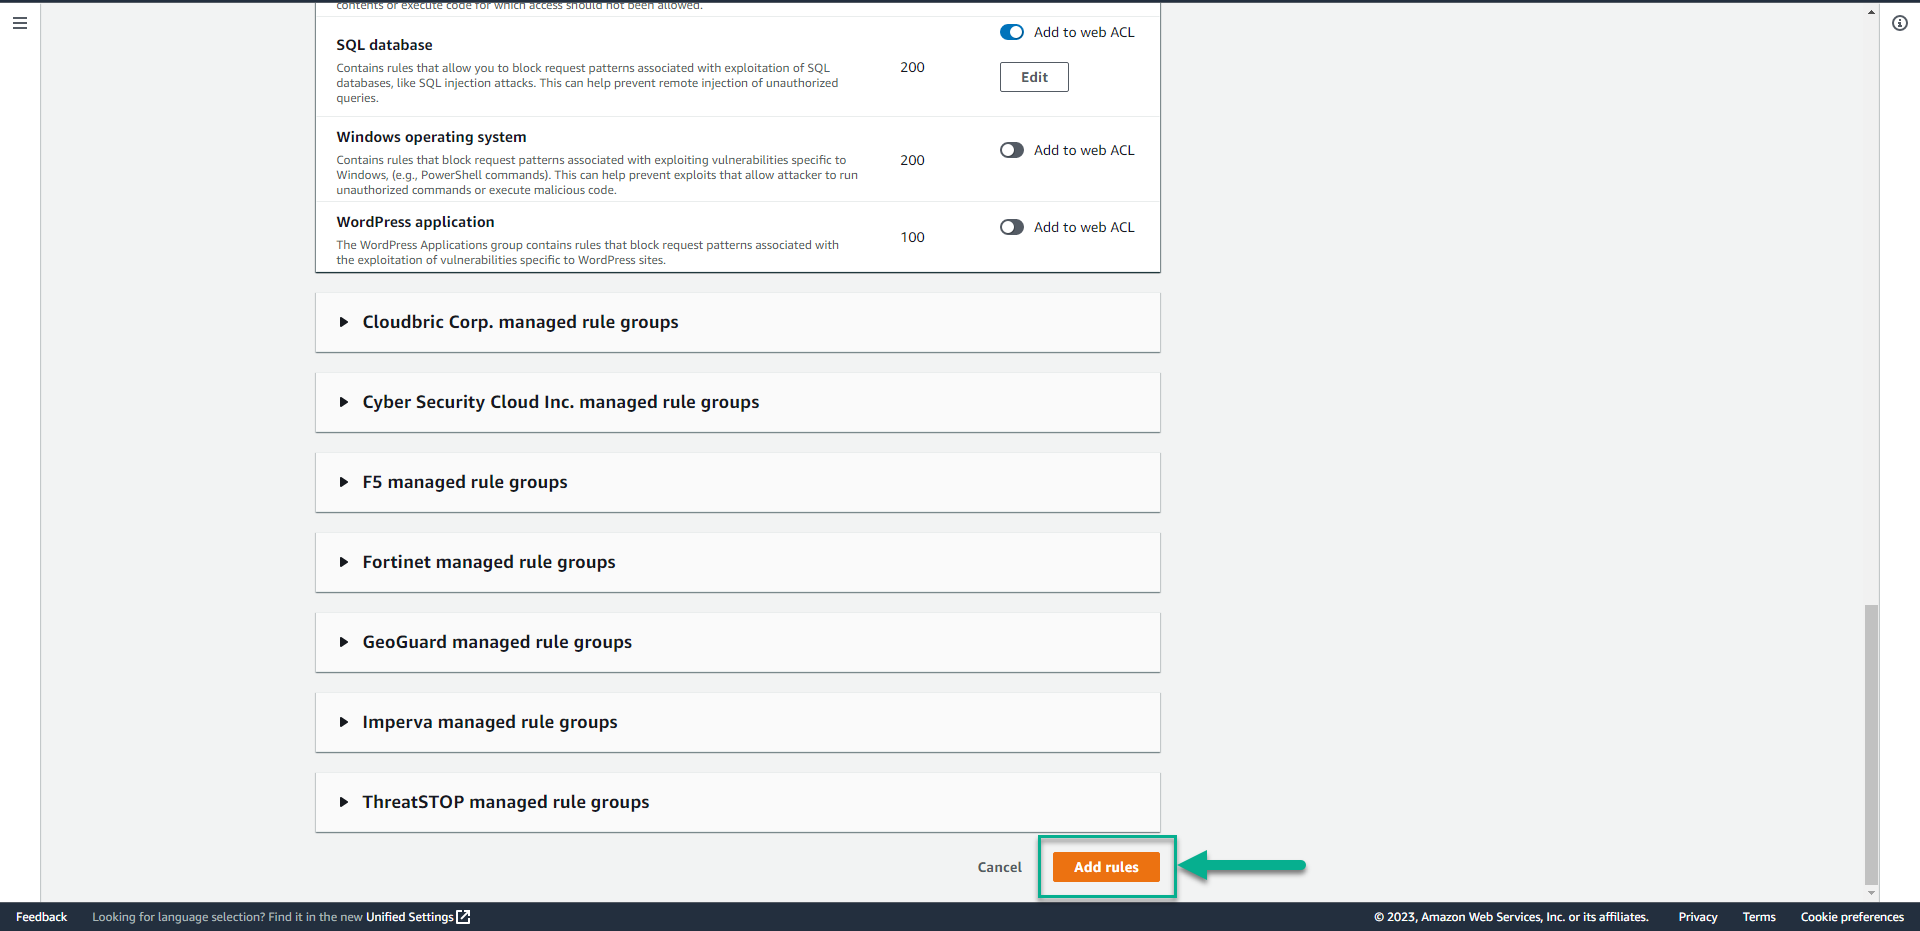
- Drag the screen down, Click Add rules.
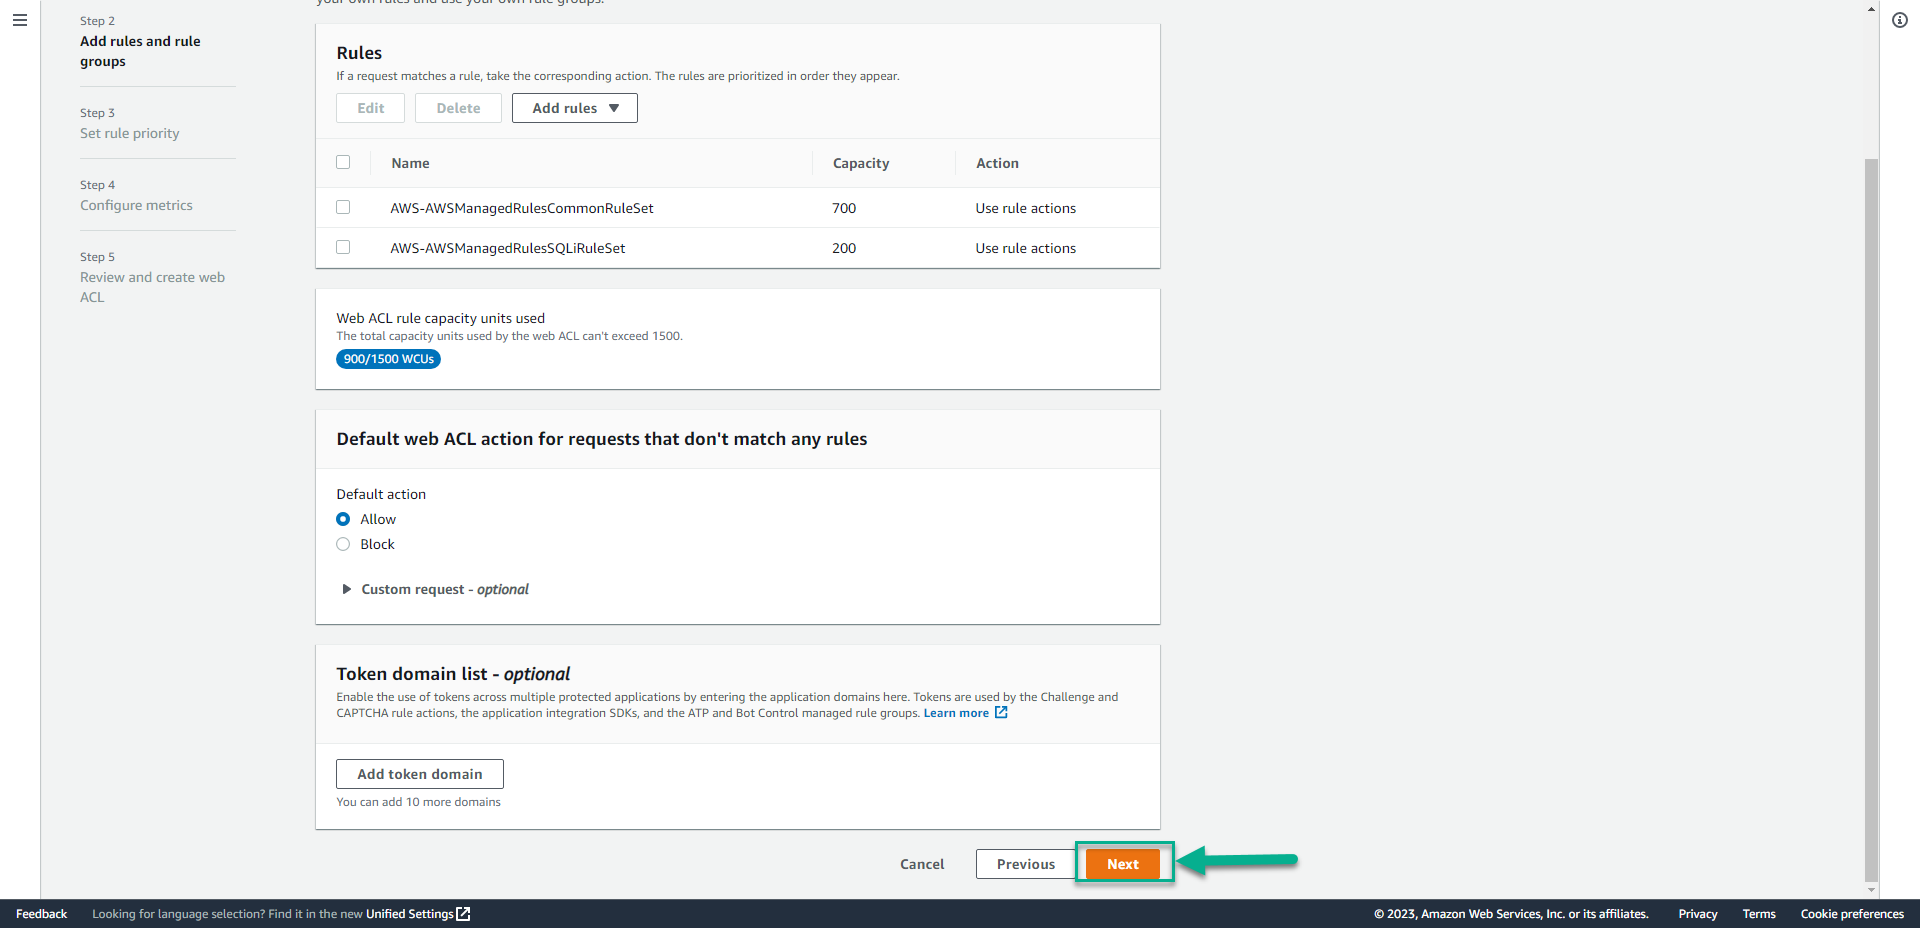
- In the Add managed rule groups page, click Next.
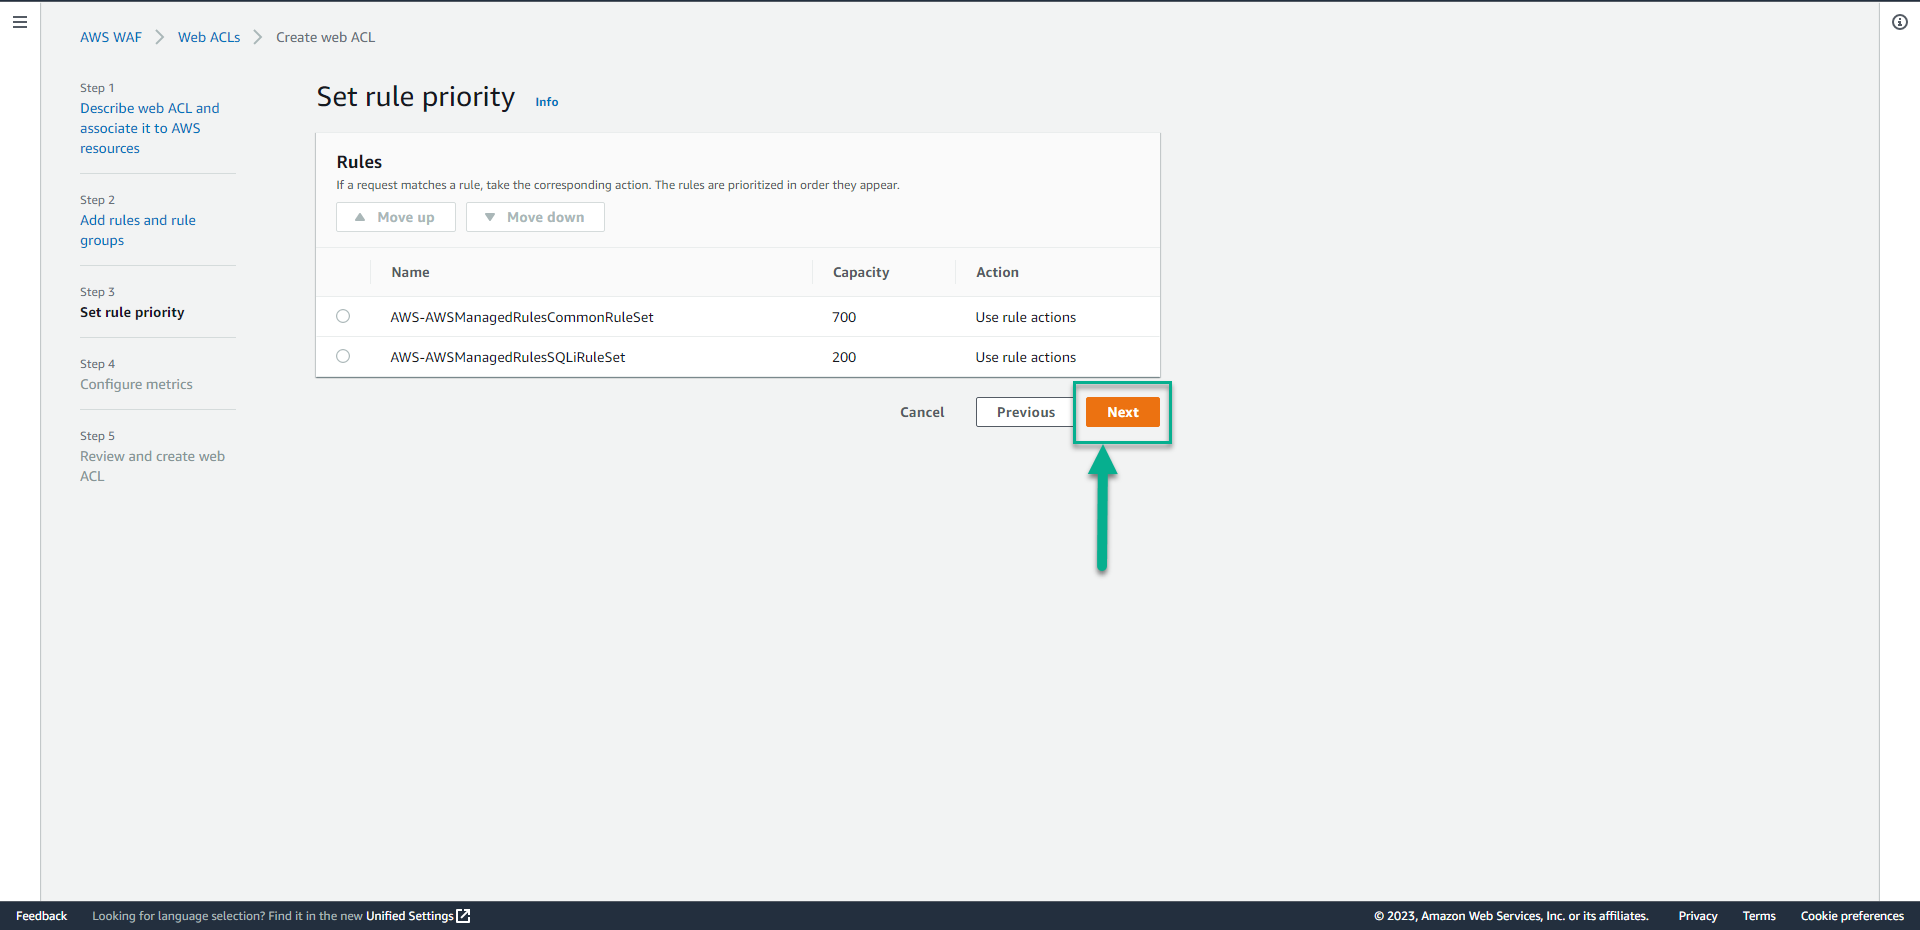
- In the Set rule priority page, click Next.
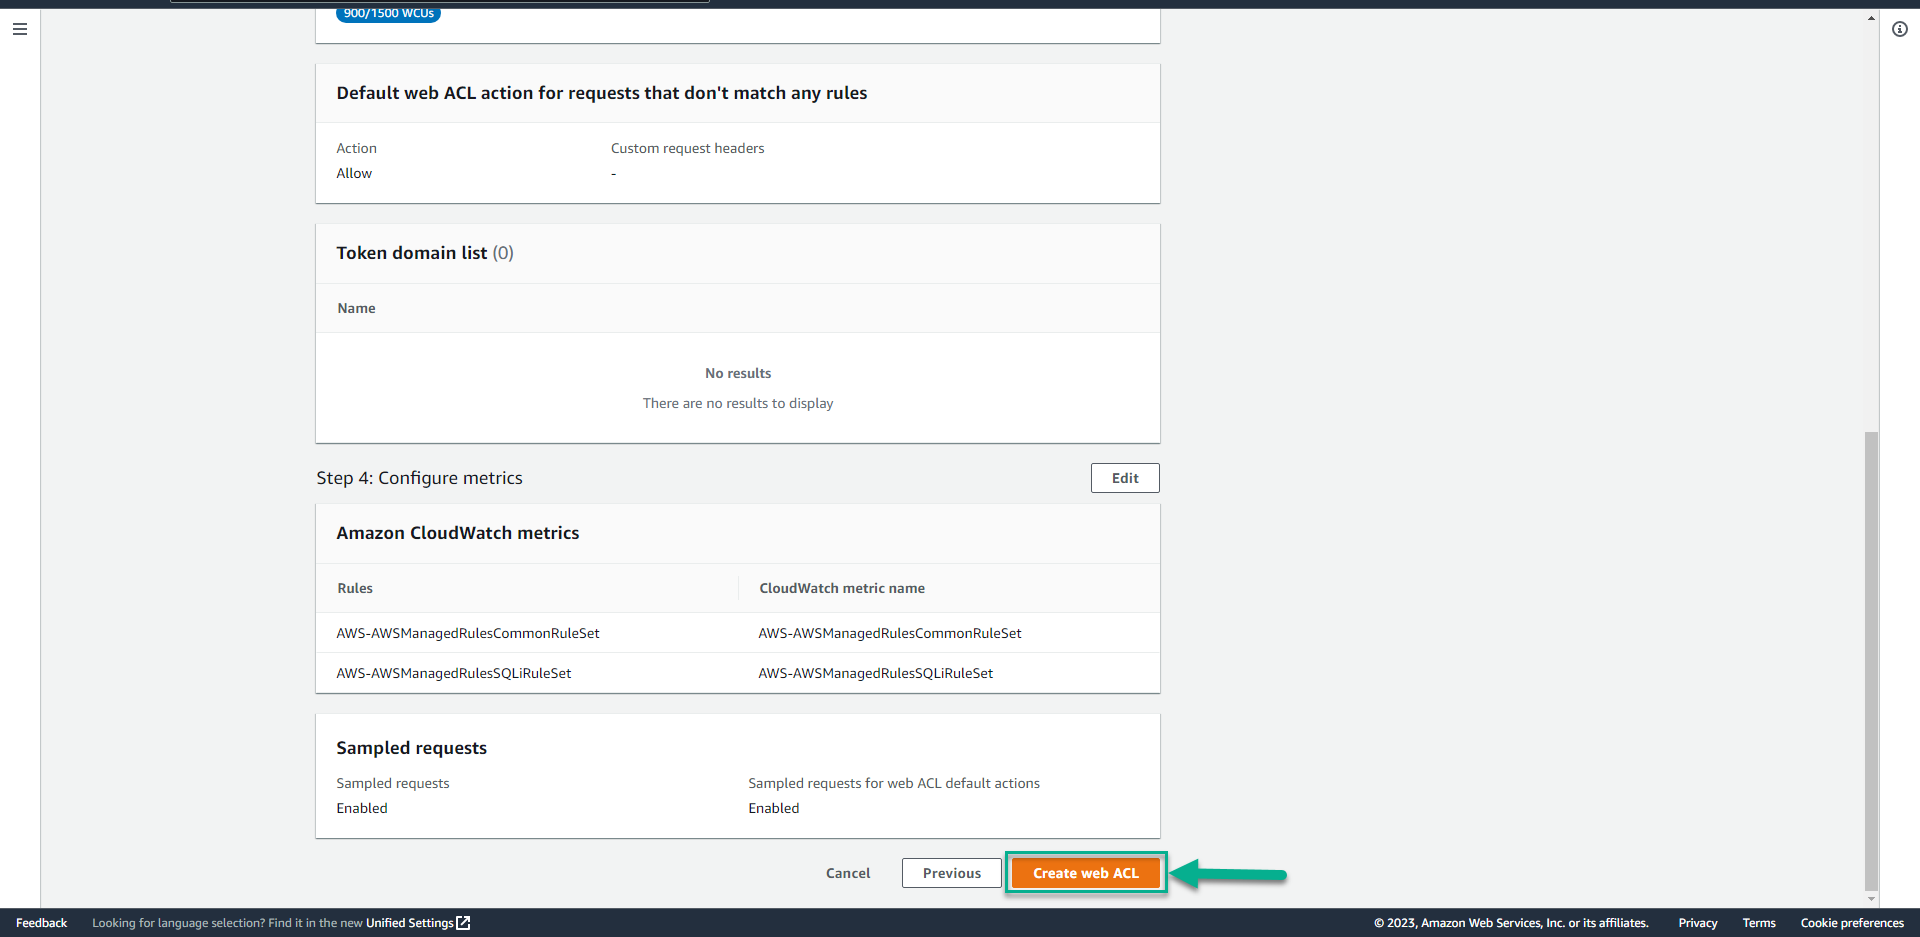
- In the Configure metrics page, click Next.

- In the Review and create web ACL page, Drag the screen down, click Create web ACL.
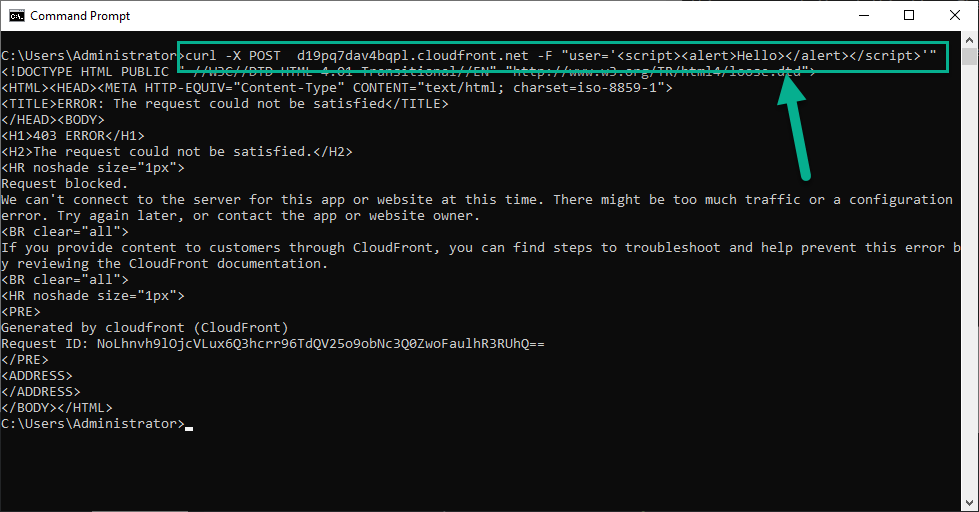
- Run command
# This imitates a Cross Site Scripting attack
# This request should be blocked.
curl -X POST  <Your Juice Shop URL> -F "user='<script><alert>Hello></alert></script>'"
 15. Run command
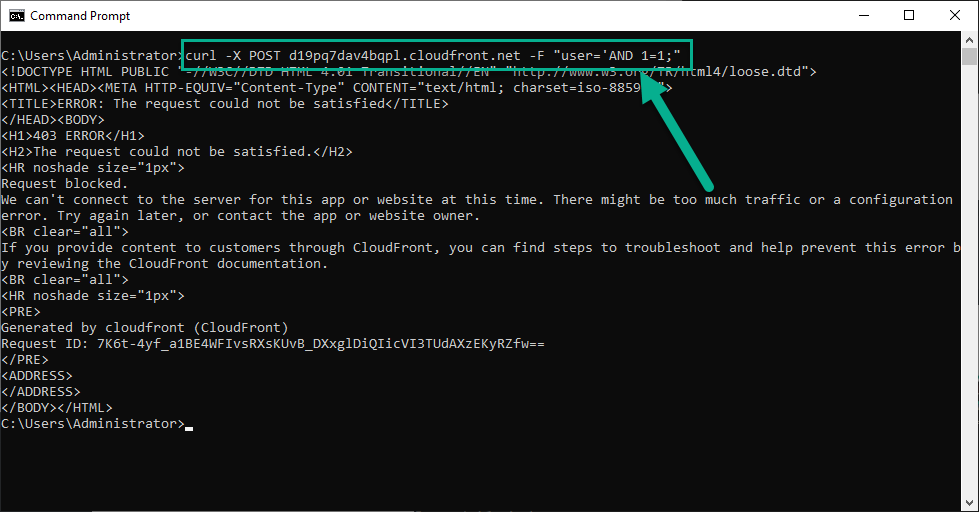
# This imitates a SQL Injection attack
# This request should be blocked.
curl -X POST <Your Juice Shop URL> -F "user='AND 1=1;"